
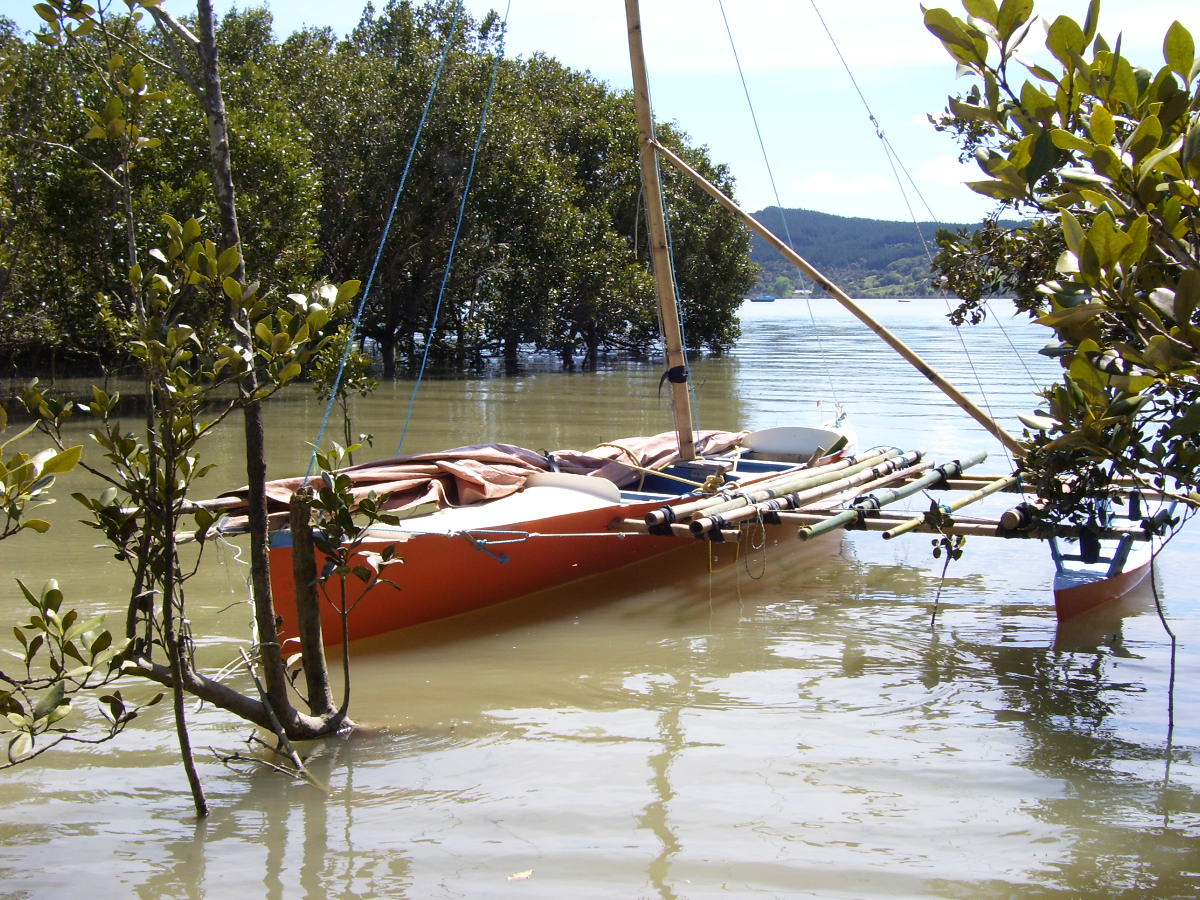
November 2009 Te Wheke has been treated to a nice coat orange paint on the ama and waka, windward hull.. Just in case I need to be noticed!
New video of downwind sailing on youtube search............. "taikaha proa"
March 2009

Visiting canoe house at Waitangi home of Ngatokimatawhaorua, TeWheke to left, Waka Tupi on right.
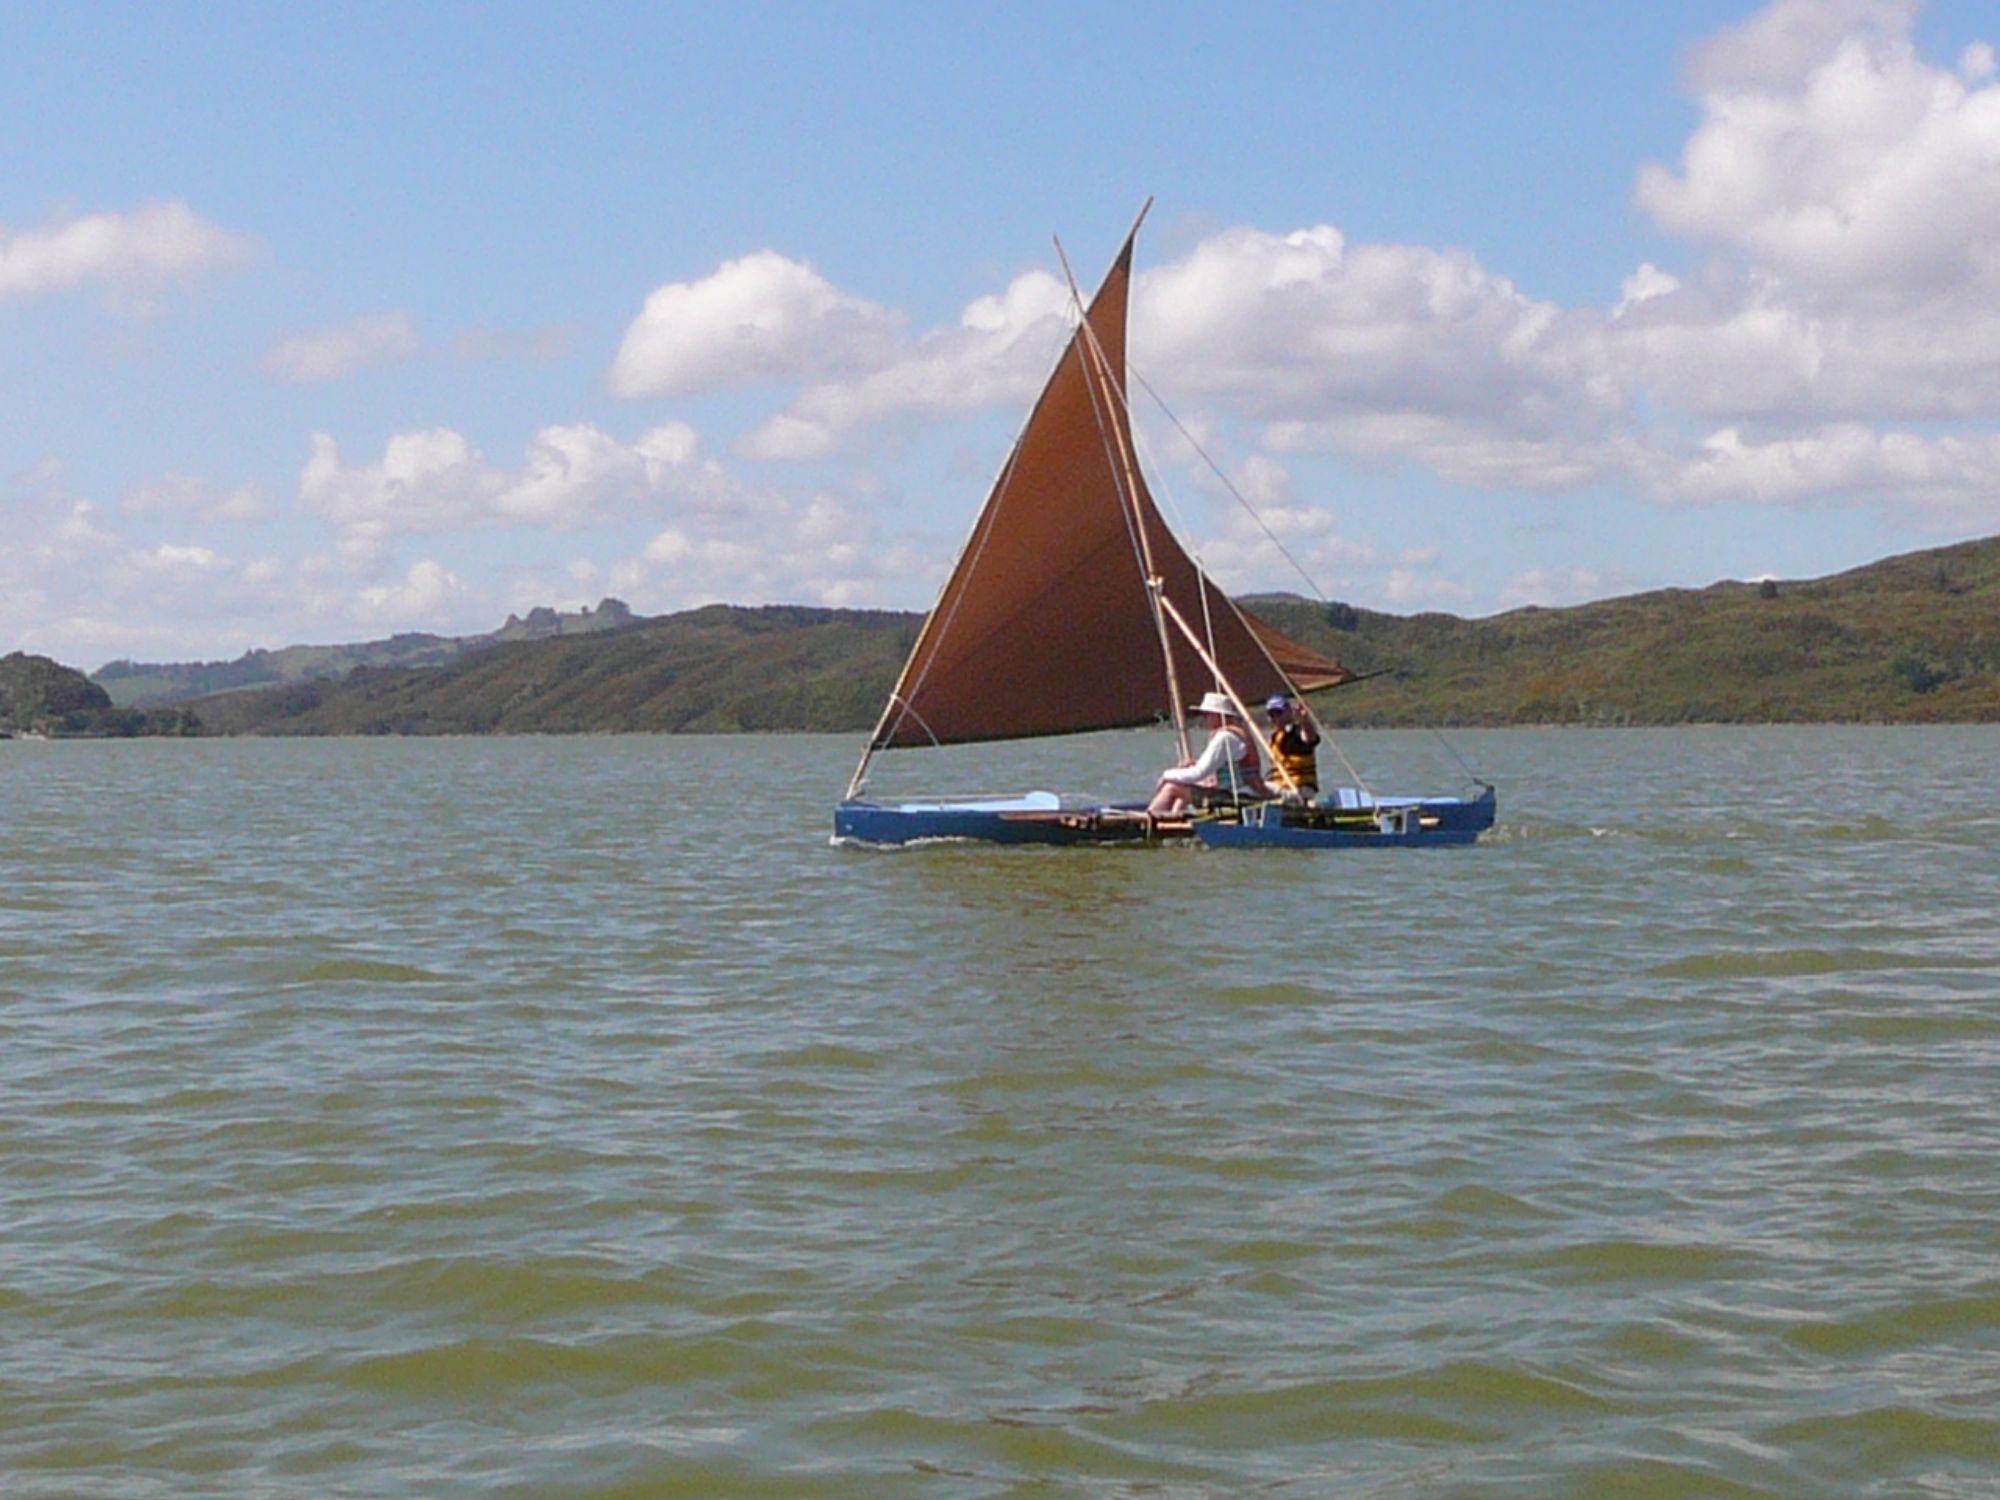
Te Wheke is a 19 foot at waterline) proa, beam 8 foot (overall), beam (at waterline main waka with crew aboard) 15 inches. cheaply made out of construction ply. The main issue is the totally flat lee side of the waka hull.
He is sailed without rudders or centre boards. A so-called 'buttsteerer", moving weight forward turns him to windward, moving weight aft turns him to lee, I carry a paddle for urgent interventions.
The cost has been under a $ NZ1000 including the sail made by Gary Dierking. Construction was quick and well under 100 hours for the first version, thinking time and subsequent modifications?????
The main hull has a bolted join at midships, so that one person can dismantle, carry and re-assemble the waka. Have now got 6 separate "water tight" compartments.
BAY OF ISLANDS TRIP MARCH 20089
I took Te Wheke (in pieces, on a trailer) over to the Waitangi River, a friend helped me slide the pieces down to shore at the bottom of Causeway Road and we put him back together. Richard and I had a gentle sail down towards Waitangi Bridge then back up river.
Three days later I drove over at dawn to catch the tide down under the bridge (mast down and out onto the waters of the Bay..
I met 2 more proa fanatics (Hone Mihaka of Taiamaitours.co.nz and Alistair Locket) on the beach at Pahia, they had seen me out sailing, neither had saiiled on a proa, so I gave them each a proa sailing lesson, the Hone went and got his waka Tupi to be the rescue boat and I sent them off on their own.
They both did a lot of proa sailing over the next two days. On the 4th day Hone and I went off on a day long trip around the Black rocks Motourua Island and back through the Kent Passage, Te Wheke was definitely overloaded total crew weight of 190kgs. We had a superb down wind (SW) run to the Black Rocks, had a feed of kina and kutae (sea urchins and mussels over at Poranui Point and then a beat home, just by dark. I have left Te Wheke with Hone for the next 2 weeks.

At b capsize one, at c great downwind run, at d pump out then capsize 2, d to g beating up wind, another pump out at g as well as fresh mussels and kina. h to i pump out whilst drifting. L homeward bound, M llight wind, N no wind.
http://www.youtube.com/watch?v=hXMYMIYcvmw
Is a video taken at d. if link fails search youtube for... Te Wheke Black rocks

Alistair ama flying.
Stop Press...video from Christmas 2008.
And you'll find 3 more under Taikaha Capsize, Going Aback, Flying an ama.
ttp://www.youtube.com/watch?v=y+ySnAoyO66hc
http://www.youtube.com/watch?v=DOS-O3PDC_s&feature=channel
if these don't work search for proa te wheke on youtube.
Dec 7th Sailing east of Rawene Hokianga NZ.
1 crew 90kg of payload total.
This image is from my garmin etrek, via GPS Utility and google earth.
wind direction was approximately between from the upwind to downwind marker, 15 knots, gusting.
From the start/finish marker, started on starboard, I tried to run as straight down wind as possible with a "proa gybe" quite early over to port tack. I then had him settled on a stable downwind run, minor use of paddle, sat on main hull, 1 metre aft of midline. Top speed 12.7 km/hr
At the bottom of the run I hardened up onto a beam reach and had the fastest speed of 15.3 km/hr. Shunted to starboard to avoid the steep waves coming round the point and shunted twice again to cross my original course at the start finish points. Highest speed on the upwind legs was 13 km/hr.
In total I'd covered 2.39 kilometres in 15mins 44seconds. One "gybe/shunt" off wind, 3 shunts upwind. Minimal "easy" reaching.
What am I learning... Downwind is possible, but plenty of searoom is needed if proa gybing is needed.. As soon as you harden up the proa accelerates rapidly and covers a lot of ground then after the shunt you are back on a fast beam reach at 90 degrees to your desired course.
(For non-proa people..proas cannot gybe like other sail boats, they have to come up into the wind, shunt the sails then bear off in the opposite direction)

wind direction approximate.

Above Te Wheke" 21/09/2008
Paul and Harmen aboard, waka extended to 19 feet, Sail by Gary Dierking 100 sq ft. Forward ama strut loose. Mast too thin.
The second launch..
21/9/08
Got all the bits on an 8' x 6' trailer, put a crutch up at the front to support the spars and off to the beach. No problem for my wife and I to do the short carry of proa parts to the sand. The joining up of the main hull pieces went well, as we were working on flat wet sand. The various iako lashings took longest, but we beat the incoming tide. Harmen had joined us, so after a trial shunt, we were off.
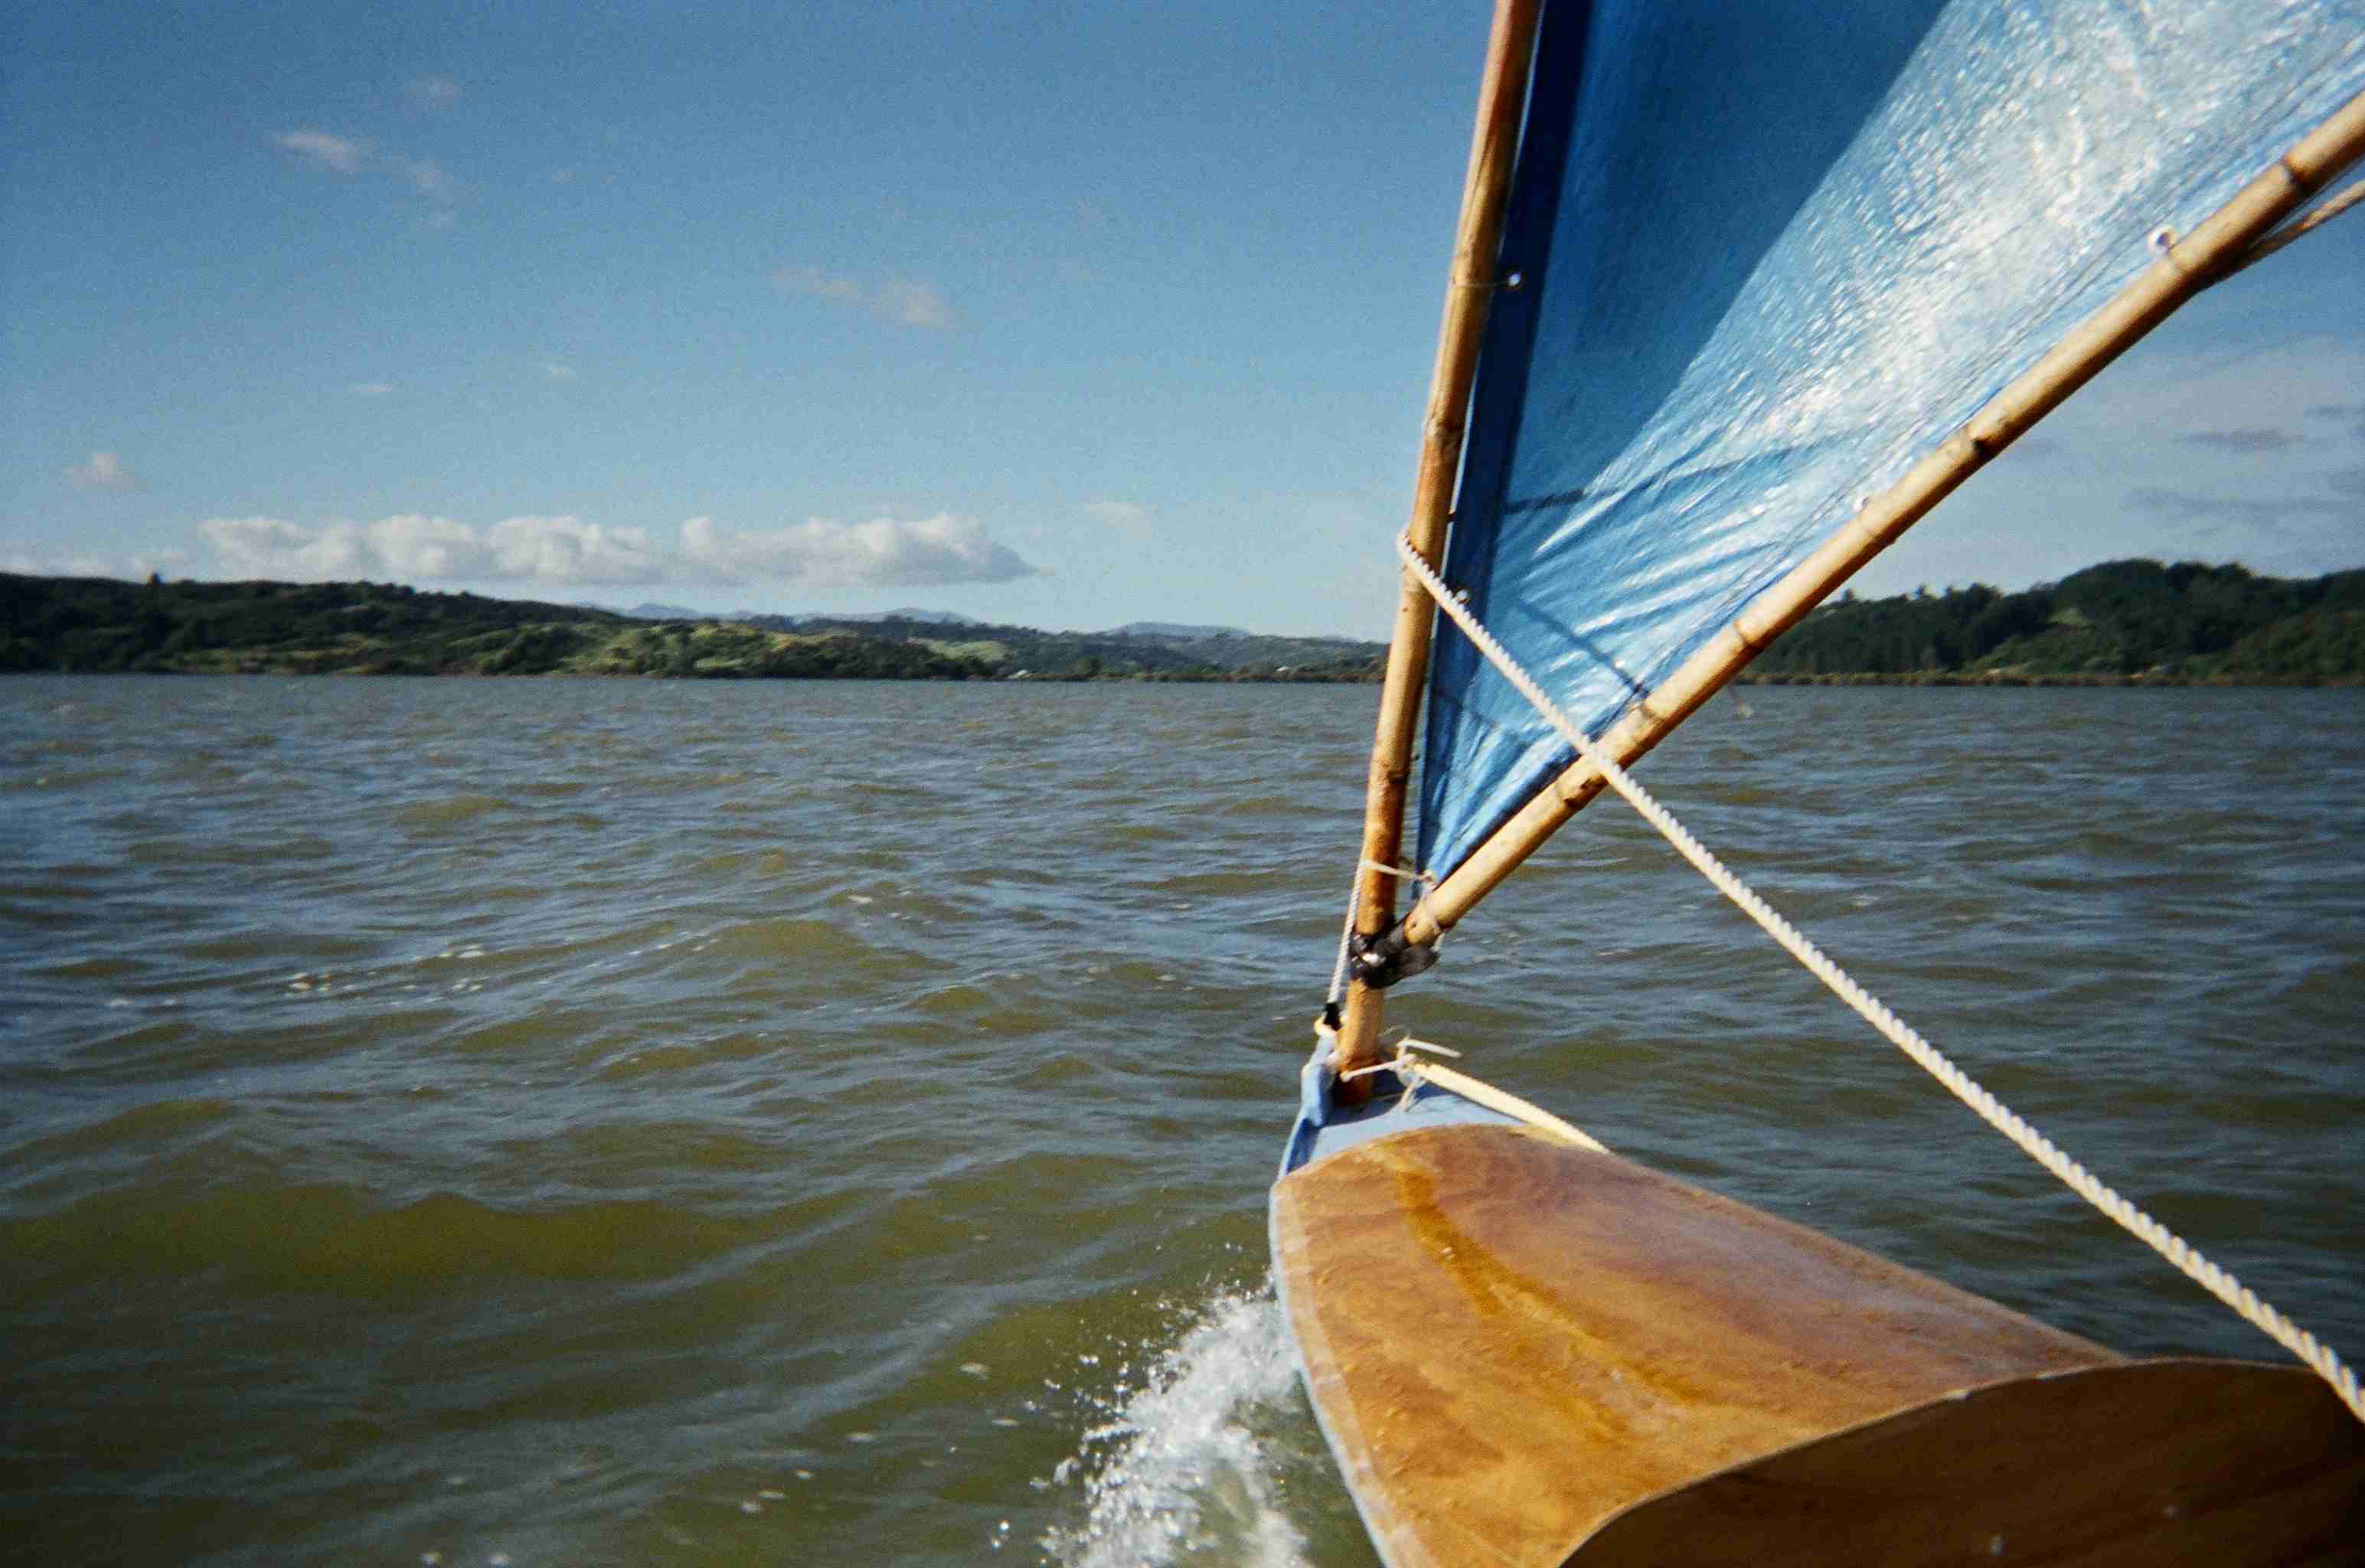
He sailed well, Gary's sail looks very promising. The mast spar is too light and bent impressively. There was a slight leak in from one bolt. The shunting needs some fine tuning as does the shock cord arrangements for the mast tilting. The drink bottle holder worked well.
We were weight shifting to steer and seemed to get as close to the wind or better than before. Didn't try downwind as the mast looked rather frail as some brisk gusts picked us up and sped us along.
We sailed back to the beach we'd left from. Needed.. a stronger mast (already under way) a decent rope for a main sheet, some silicone goop between the two waka half hulls, a turning post or cleat for the sheet, some lashing on the yard to keep the halyard in the exact position needed. Probably some brailing lines as well, Harmen has almost convinced me.
The halyard tie off point has to match exactly to the length of the aft shroud, so that the butt of the yard arrives in the right place at the bow. I don't like it floating as the whole system seems stronger when the butt locks in on the deck. The yard then actually shares some mast loads?
Still got the dash boards to replace, want the shunting fine tuned before they go back.
All over very pleased. I don't see why single handing will be any harder!! Come on the weekend. May put my etrek gps in my pocket when more confident.
The Beginning
Started planning June 07. Over next 3 months built version one which was 14ft 6".
The following tries to give an idea of my project, I screwed the leeward side down to a jig of 4 by 2 lumber. The leeward dimension was a rectangle 4300 by 500 mm.Cut from 7mm ply joined with simple overlap. Made the jig under size to leave a 50mm overlap along keel to to allow access for the wire stitching. Be careful with screw placements to jig as they have to be removed later!
Worked all measurements from a 1/16 model made of light card.
The hardest part was keeping the bow pieces from exploding out. Had to build a stop on the end of the jig as copper wire stitching just gave way.The stems were going to be vertical but the pressures involved gave me a slightly curved stem by the time I'd finished fairing up.
On the next one will place a shaped stem piece glued and screwed to leeward side, before placing the windward sides. Had trouble inside in the very narrow ends getting resin and tape in place.With this in place would assist fixing down windward side.
The windward side pieces were shaped using the model. Have kept a full size pattern to be able save time on the next proa.
The windward two pieces of ply overlapped at midships and were glued together after the keel join was well wired up. Beam turned out less than on model.
Puzzled long and hard re built in buoyancy, went for 2 tanks in the end for safety and stiffness. Used construction glue to close up the tanks and ama. Squaredrive stainless screws where needed (best things since sliced bread).
Amazed by the bamboo a whole new skill in itself.
The sailing is another pleasure, never sailed so responsive a boat. The sail is in need of refinement, the leech is all wrong, but the luff is good and telltales lie flat. The halyard is an important control, ease off a foot and away she goes. Hardly using the paddle now, but avoiding down wind stuff as I need to get home!
Cheers Paul
Te Wheke at 14ft 6in in November 07

check out the 3 videos on
http://video.google.com/videoplay?docid=5619654719166830701
cut and paste the link, or search for Hokianga Proa on Google video
Shows steering with weight shifting and sheet control.
Tortured 7mm ply forced down onto the jig.

Launching

Oct 07 I changed the bamboo mast for a stonger section soon after this.
In November 07 Had a "wreck" when the open foot wells allowed water to back syphon into the buoyancy tanks. 25 knots gusting 30 plus, short choppy 3 foot waves in wind against tide, 140kg of crew aboard. We were flying at times ...but...Couldn't bail the foot wells quickly enough, the Proa bow was submarining quite frequently for long spells, the water found it's way into the buoyancy compartments, so eventually the crew were sat on a
waterlogged raft.
A couple of shunts were done too quickly when hard on the wind, so found ourselves heading straight down wind almost immediately and with
the weight of water, had a struggle to get him round before we were aback. Eventually had to summon help by cell phone. Just couldn't bail
fast enough, perhaps we could have got overboard then bailed, but the rescuers were waiting for us and crew tiredness was a factor.
Hauling the waterlogged proa out of the water was done with too much enthusiasm by the rescuers so I have some damage to the shroud leads
to fix. The base of the bamboo mast broke during this struggle, but the rest of the spars are ok. The plywood aka supports on the ama got
wrecked as well.
Lessons, fibreglass tape all seams! Have also put sealed floors in the centre sections as well as a pair of dashboards and cockpit coaming/spray boards/wave breakers.

Louise sailing

I had a good summer sailing, but want to have a bigger sail and carry a crewman
so:-
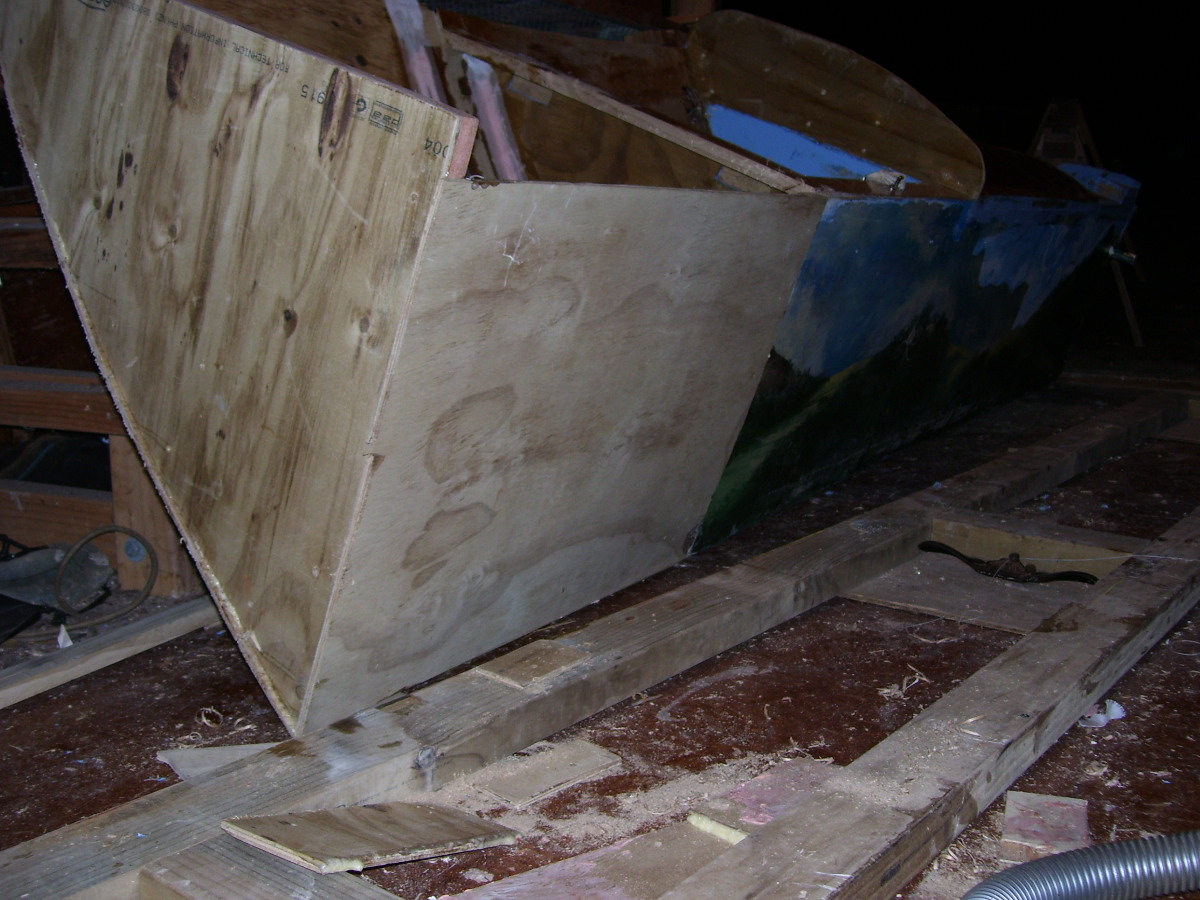
Cut in half May 08

Have made the decision that 4.3 metres is too short, the sail area is too small, so pulled the saw out and cut Te Wheke in half, am now preparing to extend each half by 700mm.
I will then have a midships join, so that I can separate the two ends for easy road transport, single handed lifting and moving the waka. Copying some of Gary's ideas.
Then intention is to build two identical bulkheads, glue and fibreglass the complete extension (now using gorilla glue, not "no more nails"), then hopefully the new sides will be in line, then cut between the new bulkheads to end up with the new port and starboard hulls. Will place floors with sealed compartments in each extension in-order to keep stiffness and strength.
The rig will be a homage to Gary's rig for the Wa'apu. During the refit the ama will get filled with plastic bottles, the keel will get a couple more strips of glass tape.
Sunday May 18th
Tides not convenient for the Optimist Kids to be out today so good progress on Te Wheke:-
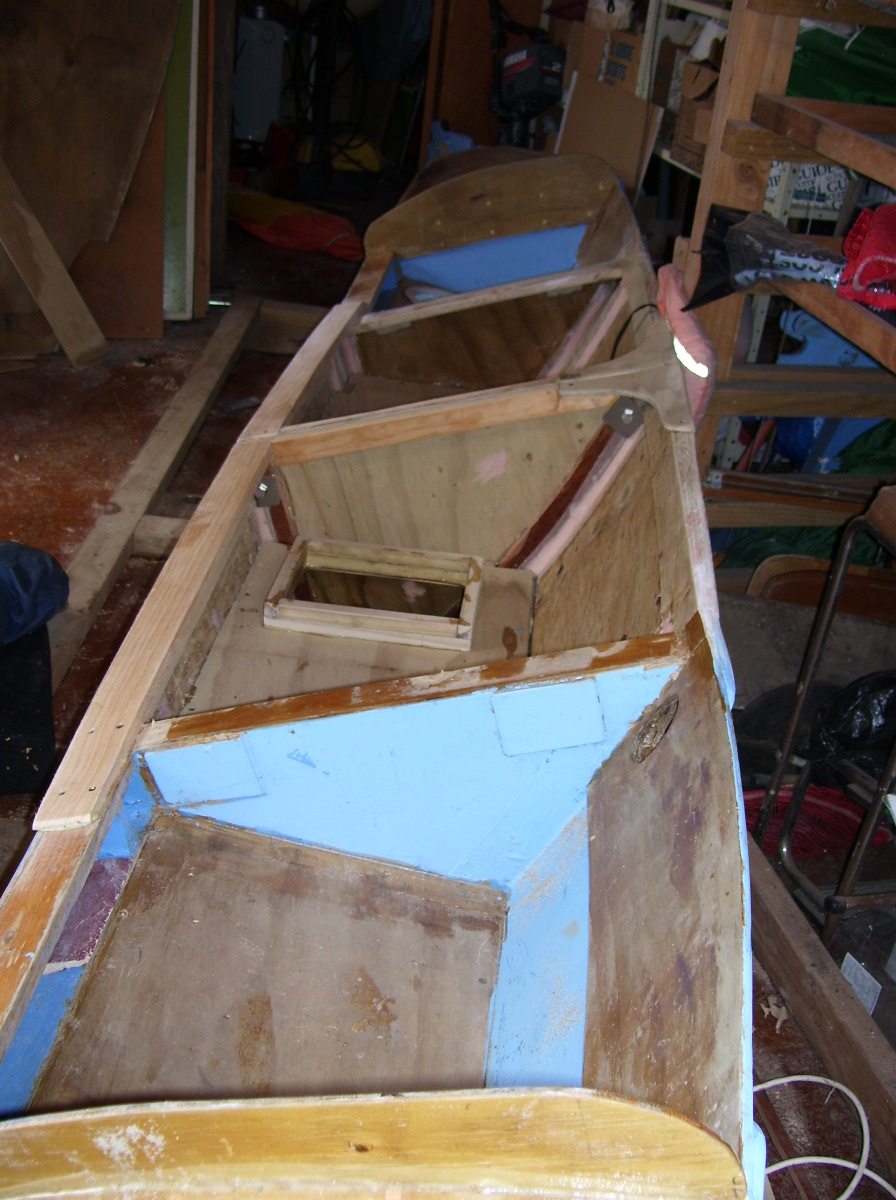
This photo shows him back on the jig, lee hull sheet in place.

Now got the windward hull piece screwed and glued.
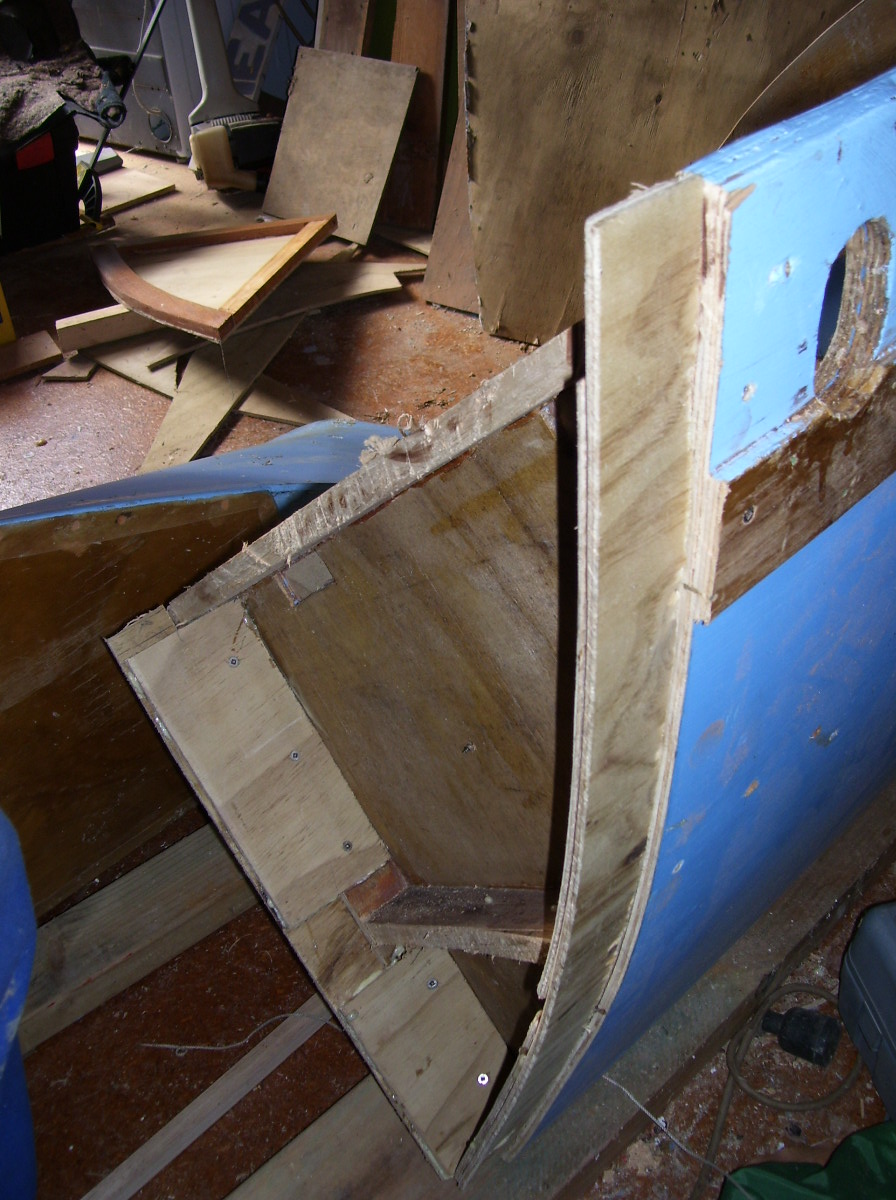
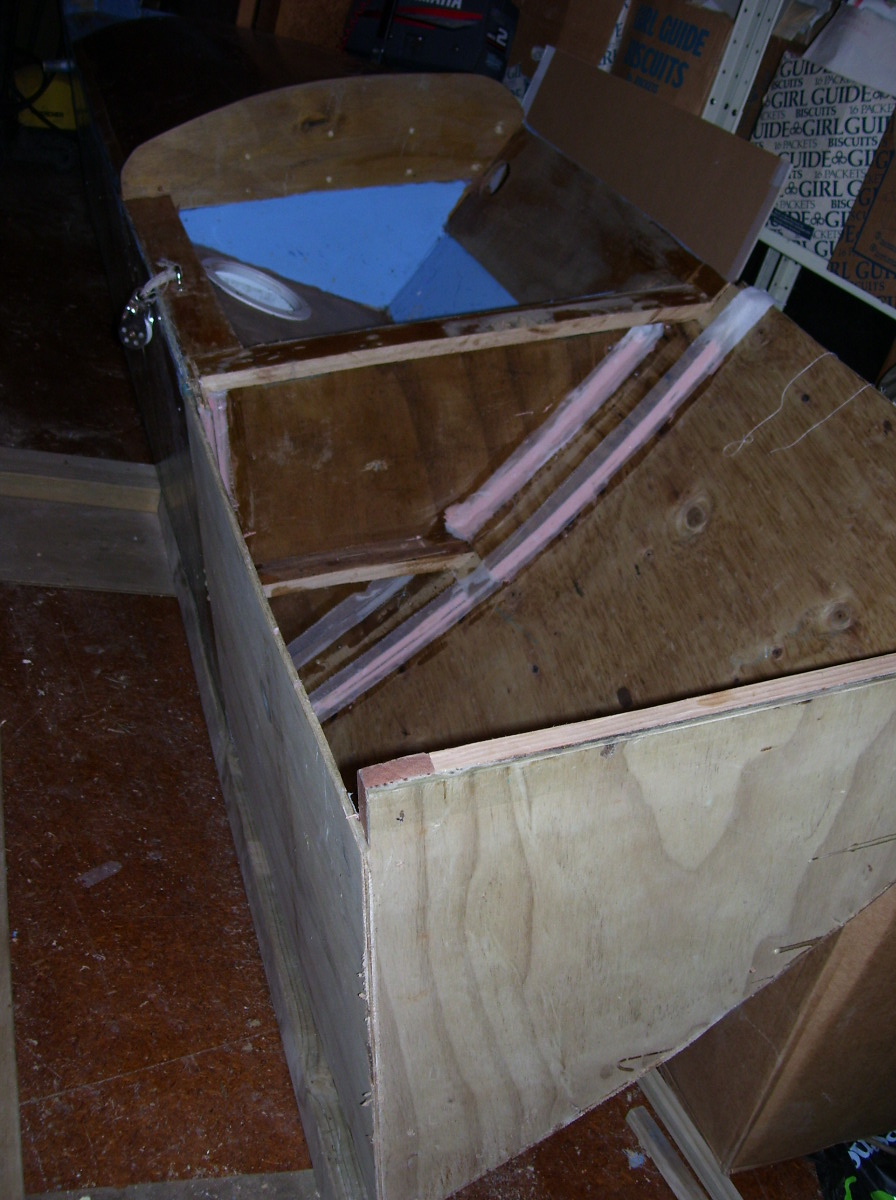
This shows the midships paired bulkheads in place, temporary bolts in place.

This photo shows the packing piece between the bulkheads, to give space for the saw!
I won't separate the two halves until knees, cockpit floor and all internal glassing and taping is done. The fiddly bits which take all the time. Will need decent sized bolts and two reasonably sized hatches for access.
Change of mind as I needed access to transom side of the bulkheads, also didn't want to have the hazzle of glassing seams which were above my head, so after glassing the easy seams.. have cut him in half again! Nervous moment or two, but had left adequate gap and no steel in the way. Now a total of 1400mm longer.
Good old 7mm construction ply, pinus radiata. $40 NZ a sheet. Te Wheke at 19 feet will have taken 7 sheets, including ama. I am into my 2nd litre polyester resin $38 per litre, about 6 tubes "no more nails" 1 bottle gorilla glue (polurethane) . 200 screws (or more) stainless steel square drive.

The outside seams will need shaping and taping, then the floors and hatches are going in. I want reasonable sized hatches, so that coats, food and water bottles can be easily retrieved.
Will go for rectangular shaped hatches with 40 mm lips, hatch cover to have a 20 mm lip, plan is to have some shock cord strategically placed to hold down the covers.
The inwales and gunwales will need to be cunningly shaped for maximum strength.
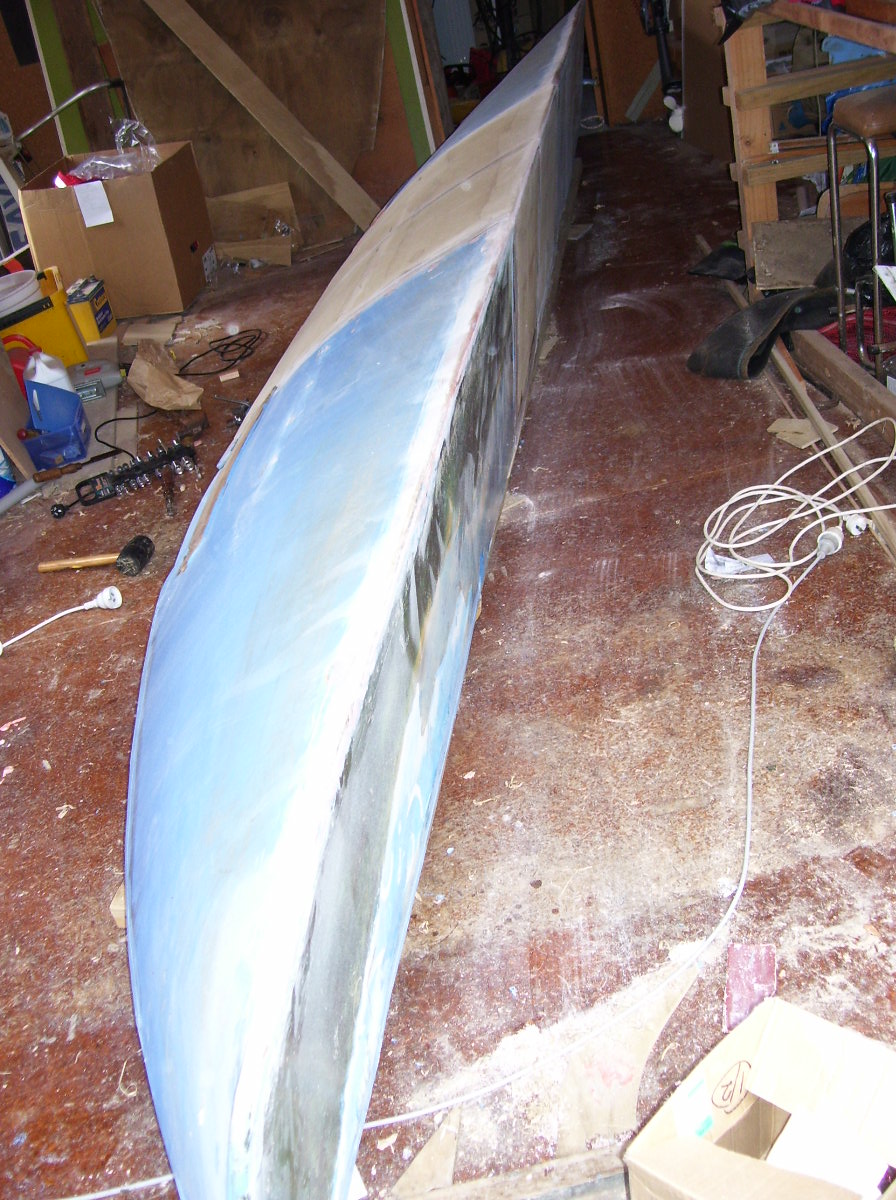
The leeward flat side of the waka will be a bit wavy I suspect, but so too is a dolphin, won't notice in a 3 foot chop. Slap on some acrylic paint instead of varnish this time. May 25th.

At this point I realised the error with the height on leeward side. However a fix is always "fun". If you can get the old "spoke shave" planes, do so as pulling towards you seems more efficient. You can brace against the work piece.
The small surform rasp has been brilliant on the rounding and shaping.
Hatches and knees, plus leeward brace completed. After Kevin's report on the Texas 2000 I will think hard about the hatch covers, though I doubt if the volume of the compartments is more than 30 litres each. Some wet suit cloth as sealant, then maybe a spanish windlass arrangement to tighten up a cord across the top of the hatch.

June 14th
Two halves bolted up for first time,
No less straight than the original, all feels very rigid and solid... time will tell.
Keel, shows the narrowness of the submerged hull.

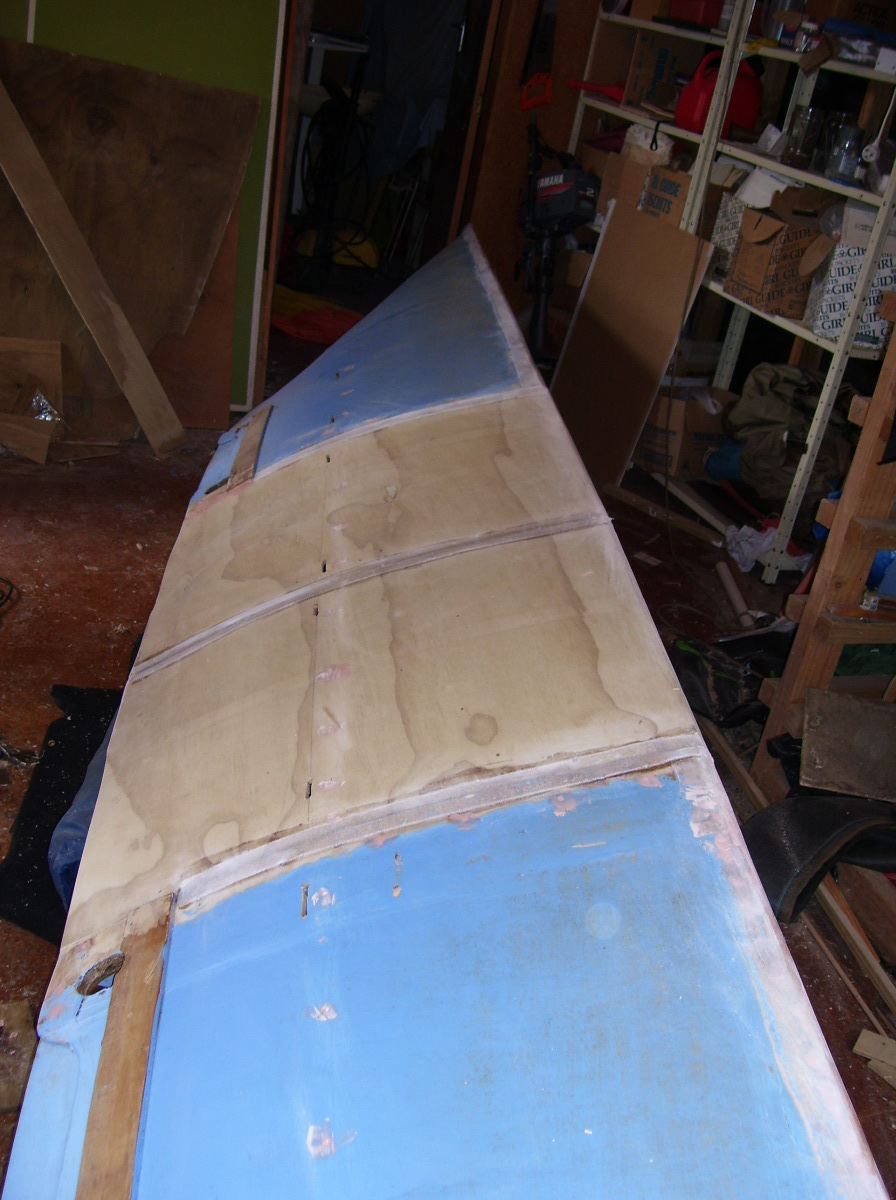
Windward, shows drains from cockpits. If too small, can be enlarged. Too big and valuable goodies might escape.
Must remember some drink bottle holders!

You can just see the cockpit drain slots, as a shorter waka these were generally above the waterline, he will float higher with the increased volume, but I hope to take a crewman quite often so will watch with interest what water line he has. (12/08, These slots are just about the waterline with 150 kg of crew).
Deck
showing bolts

Still need to glass tape keel, will do this with dynel tape and some extra layers.
Very close to trying out atas (will be bamboo again).
As will use original ama will need to modify the atas. Mast step needed as well.
June 17th order for sail has gone to Gary.
Sept 13th 2008
After a nice holiday in England with the Grandchildren, summer is almost here in NZ, so I have put all the bits together.

I have a new piece of bamboo for the spar, a bit green and heavy, but will dry soon. Have put a tilting system in for the mast as I will need to bring the COE of the sail forward I think, and also see under the boom.

First trial of the reefing points, not sure yet whether to leave some ropes permanently set up, (never did). (have reefed once in earnest in 12 months, put in on beach, knife work needed for quick release on water).

The lengthened waka meant my previous ATAs will not line up with the ama supports, the new green bamboo will be lashed into place. I have jammed drink botttles into the ama, centre section to reduce risk of the ama flooding.
With the mast I have shifted it more to lee at the base and will totally rely on the wind pressure to keep the mast upright. (Change of mind).
(after first dry run have decided to have a support pole, as the slightest breeze from the wrong direction was causing severe anxiety).
Previously the fore and aft shrouds had a wide enough base to stop the mast falling towards the ama, but when taken aback everything got stretched and slackened. Rapid lowering of the sail is essential.
Lots of fiddly jobs to do, but maybe launching next week, when safety boat organised.


Comments (2)
Othmar Karschulin said
at 6:55 am on Nov 7, 2009
Hi, saw your video "Te Wheke Black rocks". Seems you have to less buoyancy in the bows. Do you think about more changes in the boat as to add dash boards?
paul.lis.bowker@... said
at 11:20 pm on Nov 20, 2009
Hi Othmar,
Have some small dashboards, I have to remove them to trail him, they do help.
You don't have permission to comment on this page.